Tuesday, 28 May 2019

May sketch challenge 3

May sketch challenge 3

So it’s our last sketch challenge of the month! So how have you enjoyed scrapping this month? Have you done more than usual due to nsd or was your mojo overwhelmed and just run off?
I think mine did a litre of the latter but I still managed a fair few layouts so I’m pleased.
Anyway, our last sketch of the month is below, I also challenge you to make your own embellishment cluster using at least 3 die cuts! 
I can’t wait to see what you all make.

Sunday, 19 May 2019

May sketch 2 and challenge prompt


May sketch 2 and challenge prompt

Have we all recovered from NSD madness? I think I got a bit scrapped out and I didn't even get as many done as I usually do.
I'm ready to get back to scrapping though, and this is great sketch to start with. 

Jessie Grey, our guest designer for this month, did this amazing example for us using the sketch.
I love the embellishment clusters and the cutest little witch ever!
The purples and pinks co-ordinate perfectly with the photo. 
I love how the 'hip hip hooray' die cut can be read as part of the title or just an extra embellishment, it just adds an extra level of detail. 
I had this unicorn and ended up giving it to my daughter as it just looked like I'd cut the head off a horse, but Jess has made it look like it was made for this layout lol. 
So are you ready to scrap again? If so I challenge you to use this sketch, PLUS use an edge punch for the paper above the photo. If you don't have any edge punches then I challenge you to tear or fussy cut the edge instead. :)
If you make anything feel free to share it with us over on Facebook, or on Instagram @scrapbookstashbustinguk

Saturday, 4 May 2019

NSD ChalIlenge 4 - Title Mix Up

NSD ChalIlenge 4 - Title Mix Up


I don’t have any huge secret when it comes to titles on layouts but I do love the look of a fairly long title with a mixture of alphas. 

HOW DO I CHOSE A TITLE. 
Sometimes I find it really easy to chose a title. This is normally when’s a thought, feeling, memory or something that was said that I associate with the photo I’m using. Other times I find it much, much harder. When this is the case there are a couple of things that I look at. Firstly, do I have a chipboard/ die-cut/ Perspex piece that I can use to prompt a title? If I do then yayyy. If not is there a song title/quote/poem I could match to the photo? If neither of these help then I tend to go to https://www.theperfecttitle.com/

Choosing a title can be difficult but remember not every page has to have one. 

ONCE I HAVE CHOSEN A TITLE
Once I have chosen a title (when not using chipboard etc) I decide what word/words I want to emphasis. It might be that I have two words that I want to emphasis but feel that one is more important than the other. In this case I would chose two different alphas - trying to make the word I feel is most important the boldest (in this case dinosaur ðŸ¦• ) Once I had chosen the alphas for this I built the rest of the title around it. 

In this case I knew that I wanted ‘afraid’ and ‘no’ to also be fairly bold as I felt they were as important. For the ‘afraid’ I used a lower case alpha in a sparkly green. I went with this as I felt it complimented the colours in the photo, wasn’t as bold as ‘no’ and ‘dinosaur’ but was still easily readable. 

For the ‘no’ I used a large, bold gold alpha. This is almost the same sized lettering as the ‘dinosaur’. My only reason for this is that when I read the title it reminds me of ‘I ain’t afraid of NO GHOST’ (yep that’s where the inspitation for this title came from ðŸ™ˆ) When I say this out loud ‘no’ and ‘ghost’ have the most emphasis so I wanted to mimic this. 

For the filer words I tend to use small tile letters. These are still easily readable but also allow me to use one alpha for more than one word which I think helps to pull the title together.

Once I have my title I have a look to see if I want to add anymore to it with die-cut words/Perspex pieces etc. I only tend to do this if it actually adds something to the title. 

I hope that having a little look at my process may be helpful when it comes to making titles. 


THE CHALLENGE

Use 3 or more different alphas on a layout (this doesn’t include word stickers” 

Use at least 5 words in your title

Use a chipboard/ die-cut/ Perspex piece as PART of your title.

As always you do not have to use all options to enter. You can use one or all of them. 

To be eligible for a prize your entry must be uploaded by midnight Sunday 12th of may (gmt). It can be a layout of any size, card, travellers notebook page or an off the page item but it MUST be created for the challenge and not before or entered into other challenges elsewhere.
Sorry but only those in the uk will be eligible for a prize to keep post costs down, but anyone is welcome to share what they make ðŸ™‚ If you use instgram we can be found using #insdstashbusting or @scrapbookstashbustinguk please tag us in your creations!Updated about a week ago

INSD CHALLENGE 3 - Punches


                           INSD CHALLENGE 3 - Punches

I have tons of punches in my stash, some I use lots, others I don't think I've used once but I cant bare to part with them because 'I will use them some day'
I love how versatile punches can be, you can use them to make embellishments, to just tuck behind photos or papers to add depth and interest, to make boarders. A quick look on pinterest gives hundreds of ideas. 
So with that in mind I challenge you to pull out your punches, and pick from the following options to create something.

- Use a small punch to lots of the same shape, at least 7, and use them on your work.

- Take a plain sheet of cardstock, a punch, and scraps of paper and use these ONLY to create your background. You can add a photo, card for matting the photo and embellishments but no other papers.

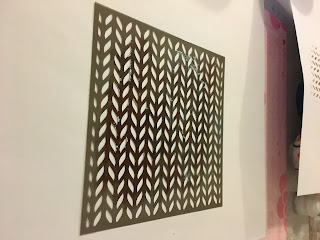
- Use a negative, the part leftover once the shapes have been punched out. 

To be eligible for a prize your entry must be uploaded by midnight Sunday 12th of may (gmt). It can be a layout of any size, card, travellers notebook page or an off the page item but it MUST be created for the challenge and not before or entered into other challenges elsewhere.
Sorry but only those in the uk will be eligible for a prize to keep post costs down, but anyone is welcome to share what they make. If you use instgram we can be found using #insdstashbusting or @scrapbookstashbustinguk please tag us in your creations!

INSD CHALLENGE 2 - Mixed media

                            INSD CHALLENGE 2 - Mixed media

 There are several different types of mixed media that can be used on pages from paint, ink, mist, texture/ modelling paste, water colour pencils and so on. The possibilities with these products are only limited to your imagination.

I don’t pretend to be amazing at mixed media but I do always enjoy giving it a go. 

My layout for this challenges uses a couple of different types of mixed media. I tend to work with water colour pencils as my main source of media. For this I have firstly used the smooshing technique. This is a very easy and unpredictable method which uses a piece of packaging and some sort of paint/mist. I use water colour pencils for this and scribble on some packaging then add water. I tend to layer up the colour to get a more intense effect. I use kitchen roll to soak up any excess water/paint that’s sitting on the top of the paper. For this page I used pink, aqua and purple. This always seems to be my base layer of mixed media that I then build upon. 


Splatters- I added some splatters on top of the smooshing using he same water colour pencils. I splattered using a small paintbrush from the end of the pencil. I also added some gold using a Nuvo aqua shimmer pen. 


I let this dry fully before adding some stamping in a similar colour of pink using both a script stamp and a little cluster of stars stamp. I like to do this to give the idea of a little more dimension. 


Finally I added some fake splatters using modelling paste and a stencil. This gave dimension and extra texture to the background. 


I had no idea where this layout was going when I started the background but I actually really like how it has turned out. I love the look of mixed media on my layouts whether that’s just a little bit or a lot. 


Options for this challenge:

1. Use the smooshing technique with at least 3 different colours.

2. Use at least 2 different stamps on your layout

3. Use a stencil, whether this be with modelling paste, ink, water colour pencils or another method it is up to you. 

As always you do not have to use all options to enter. You can use one or all of them. To be in with a chance to win a small prize from us please add your layout to the album by midnight on the 12th May (gmt).
#insdstashbusting

INSD Class one - Uses for a stencil

INSD CLASS 1 - Uses for a stencil

Hi again! So welcome to our first class, both of the weekend and ever lol. 
For this class I thought I'd demonstrate a few ways you can use a stencil. I don't know about you but I have quite a few of these so using them in different ways will certainly add a lot more to my layouts.
Plus once you buy it once its re-useable so works out cheaper in the long run 

EXAMPLE ONE - Texture paste
Probably the most common use. Texture paste is a brilliant way to add depth and texture to your layout, hense the name I guess lol. You can buy it in lots of different colours, matt finish or glittered or shimmery. It can be pricey but you tend to get quite a lot so it lasts a long time.
A good tip is to try white first, then add inks to it to make different colour paste while keeping costs down 
Some people use fancy pallete knives, I use an old hobbycraft loyalty card which works great for me lol. simply put your stencil on your page where you want your paste to go, maybe using some washi to hold it down, and spread a small amount of paste over the stencil. Remove and let dry.
Always clean your stencil right away, and that stuff dries rock hard!


EXAMPLE TWO - Drawing
Really quick and easy use here. Simply tape your stencil to your page, and draw through  Much less messy use than texture pastes so its great if you're in a rush or have a small amount of space to scrap.
Channel your inner child!


EXAMPLE THREE - Ink
Theres a bonus use here, I'm super lazy so anything which allows me to not clean is a bonus to me!
Use one - traditional use first, simply tape your stencil down and use your ink pad to stamp through. 


Use two - Don't clean your stencil yet! Get another sheet of paper, turn your stencil over so the dirty side is against your paper and rub it with your finger to create a negative look.


I hope this has been helpful and clear enough, any questions please ask 
There are no prizes for this, simply just for fun  Please share if you try anything based on this class. If you use instgram we can be found using #insdstashbusting or @scrapbookstashbustinguk please tag us in your creations!

INSD Challenge one, Patterned paper

INSD Challenge 1 - Patterned Paper

And we're off! Challenge one is a nice easy one to get you started. When joining our group we ask 3 questions, one being what item in your stash do you want to use up the most. The overwhelming answer is Patterned paper.
So the options for this challenge are as follows:

- Use 3 different patterns of patterned paper. So spots, stripes, florals, chevrons etc.

- Use a new paper (within the last 6 months) and an old paper (at least a year old)

- Use at least 8 different patterned papers.

To be eligible for a prize your entry must be uploaded by midnight Sunday 12th of may (gmt). It can be a layout of any size, card, travellers notebook page or an off the page item but it MUST be created for the challenge and not before or entered into other challenges elsewhere.
Sorry but only those in the uk will be eligible for a prize to keep post costs down, but anyone is welcome to share what they make 🙂 If you use instgram we can be found using #insdstashbusting or @scrapbookstashbustinguk please tag us in your creations!